Easy Round Floral Hot Pad Free Crochet Pattern
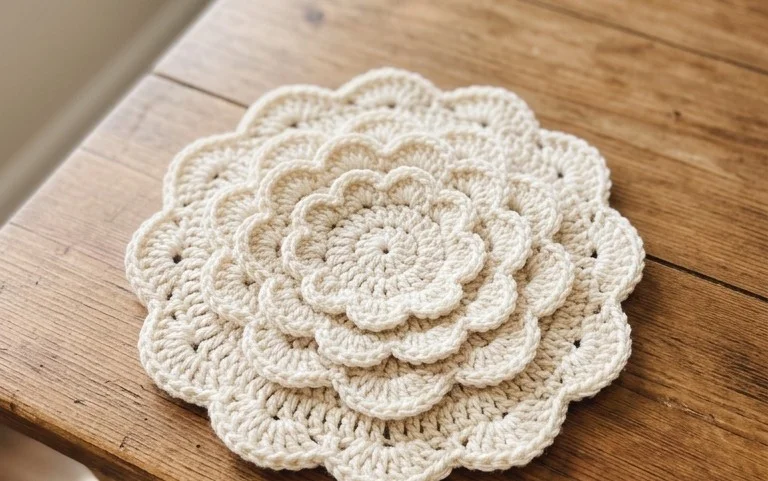
Cotton yarn worked into a dense, flower-like spiral creates a thick barrier that protects wooden dining tables from hot ceramic dishes. This project suits beginners who want a functional housewarming gift that looks far more complex than it actually is. You will master the join-as-you-go technique to build these circular petals, ensuring the center stays flat without bowing or folding up at the edges. Since these pads only take an hour or two to complete, you can build a full matching set for your kitchen. Creating functional decor feels satisfying when you see your stitches hold up under heat.
Why This Project Is Worth Making
The Classic Crochet Granny Square is the fundamental building block of crochet design. This specific version uses a traditional three-double crochet cluster structure that creates a balanced, non-twisting square. Its primary benefit is the highly rhythmic, repetitive stitch pattern, which makes it ideal for working on while traveling or watching television. Because it works from the center outward, you can easily adapt the size to become a coaster, a dishcloth, or a full-sized blanket by simply adding more rounds. This project excels at using up leftover yarn scraps, as each round can be worked in a different color to create a vibrant, scrap-friendly finish.
I started this project to use up my leftover cotton yarn and found the pattern so easy to follow that I finished six squares in one sitting. The resulting texture is sturdy and lays perfectly flat without any warping.
— Sarah, hobbyist crafter
Pattern Overview & Skill Level
- Skill Level: Beginner
- Approximate Time: 30 minutes per square
- Construction: Worked in joined rounds, starting from a center magic ring and expanding outward.
- Finished Dimensions: Approximately 6 inches by 6 inches using worsted weight yarn.
Materials & Supplies Needed
- Yarn: Worsted weight (#4) cotton yarn, approximately 20 yards per square. Cotton is recommended for its stitch definition and durability.
- Hook Size: 5.0 mm (US H-8).
- Notions: Tapestry needle for weaving in ends, sharp scissors.
- Yarn Substitutions: Acrylic yarn of the same weight will result in a softer, squishier square, while wool will produce a warmer, slightly heavier item.
Stitch Guide & Abbreviations (US Terms)
- ch = chain
- sl st = slip stitch
- dc = double crochet
- dc-cluster = 3 dc worked into the same space
- MR = magic ring
- st/sts = stitch/stitches
- sp = space
Step-by-Step Pattern Instructions
Follow these instructions to create your square. The chain-2 at the corner counts as the space between clusters.
- Rnd 1: Start with a MR. Ch 3 (counts as first dc), work 2 dc into the ring, ch 2. Work 3 dc into the ring, ch 2. Repeat from * to * two more times. Join with a sl st to the top of the initial ch 3. (12 dc, 4 ch-2 spaces)
- Rnd 2: Sl st into the next ch-2 corner space. Ch 3, work 2 dc, ch 2, 3 dc all in the same corner space. Ch 1, skip 3 sts, (3 dc, ch 2, 3 dc) in the next corner space. Repeat from * to * two more times. Ch 1, join with a sl st to the top of the initial ch 3. (24 dc, 4 ch-2 spaces)
- Rnd 3: Sl st into the next corner space. Ch 3, 2 dc, ch 2, 3 dc in same corner. Ch 1, 3 dc in the next ch-1 space, ch 1, (3 dc, ch 2, 3 dc) in the next corner. Repeat from * to * two more times. Ch 1, 3 dc in the last ch-1 space, ch 1, join with a sl st to the top of the initial ch 3. (36 dc, 8 ch-1 spaces, 4 ch-2 spaces)
- Finishing: Fasten off leaving a 6-inch tail. Use a tapestry needle to weave the yarn end through the back of the stitches to secure it.
Care & Washing Instructions
- Machine wash in cold water on a gentle cycle to prevent shrinking or color bleeding.
- Lay the square flat on a clean towel to air dry, reshaping it into a perfect square while damp.
- Lightly steam block if the edges appear slightly curled after drying.
Pro Tips & Common Mistakes to Avoid
Maintain consistent tension by holding your yarn with a steady, firm grip; if your dc stitches feel loose, drop down one hook size to 4.5 mm. Always place a stitch marker in the top of your initial ch 3 to make finding the join point easier in each round. When weaving in your ends, run the needle through the base of the stitches on the wrong side for at least one inch to ensure the yarn does not pull out over time. If you decide to make the square larger, remember that adding more rounds will increase the amount of yarn required exponentially, so ensure you have sufficient supply before starting a larger project.
Frequently Asked Questions
Can I use a different weight of yarn for this pattern?
Yes, you can use any weight of yarn, but ensure you pair it with the appropriate hook size. A thinner yarn will result in a smaller square, while a thicker yarn will create a larger, denser fabric.
Is this pattern suitable for someone who has never crocheted before?
Yes, this pattern relies on basic stitches and simple repetition, making it an ideal first project for a beginner looking to master the double crochet and chain stitch.
How do I join these squares together to make a blanket?
You can join squares using a whip stitch along the back loops of the edges or by working a row of single crochet stitches through both layers of two squares held wrong-sides together.
Can I sell the finished squares that I create?
You are welcome to sell physical items created from this pattern. However, do not sell or redistribute the written pattern instructions themselves, as the copyright remains with the designer.
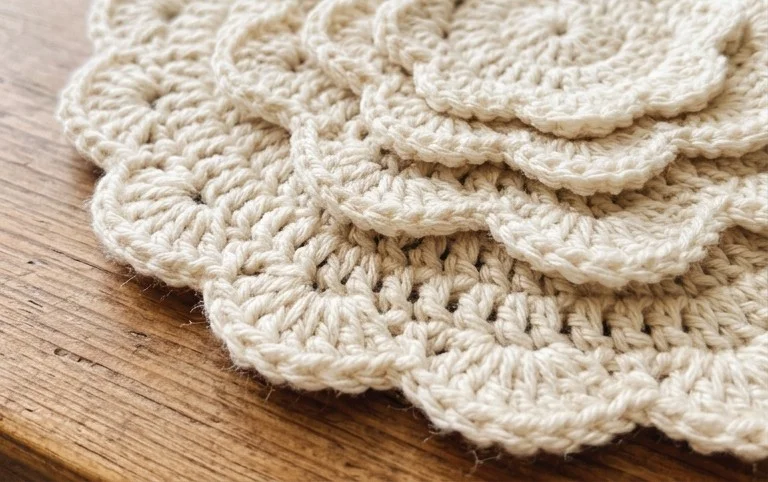
Your finished piece provides a thick, cushioned layer that keeps your countertops safe from high temperatures during dinner prep. For a larger table centerpiece, try holding two strands of yarn together to increase the thickness and size of the base. If you enjoy how this circular design came together, take a photo and share it with your community online. I have plenty of other home accessory tutorials on the blog for you to browse whenever you need a quick afternoon project to keep your hands busy.