Easy Cat Ear Beanie Free Crochet Pattern for Beginners
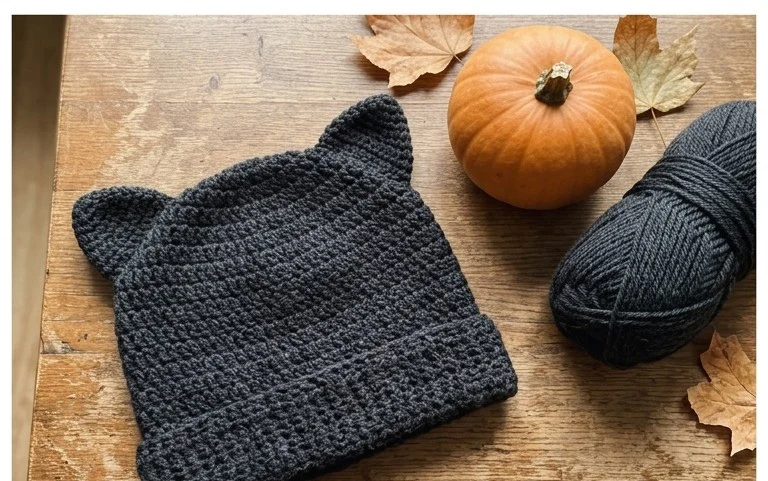
Soft worsted yarn comes together to create this snug beanie, giving you a playful accessory that sits comfortably on your head without feeling bulky. The fabric features a ribbed texture that mimics the look of traditional knitting, while the silhouette forms subtle, pointed ears once you cinch the top corners. It provides a quick way for beginners to practice working in rows and understanding how flat panels transform into wearable items. You will enjoy watching the simple half double crochet stitches build up over a few hours, resulting in a cozy handmade piece for chilly walks or winter gifting.
Why You’ll Love This Pattern
This classic crochet beanie works up quickly using a simple ribbed construction that creates a stretchy, comfortable fit. The pattern relies on half double crochet stitches worked in the back loops only, which provides a sophisticated, knit-like texture without the need for knitting needles. Because the fabric is worked flat as a rectangle and then seamed, it is an ideal project for practicing consistent tension and clean edge-work. You can complete this hat in a single afternoon, making it a reliable choice for last-minute gifts or stocking your market inventory.
I finished this hat in one evening while watching a movie. The ribbed texture is so stretchy and soft, it fits perfectly without being too tight around my forehead.
— Sarah, hobbyist maker
Pattern Overview & Skill Level
- Skill Level: Beginner
- Approximate Time: 2 to 3 hours
- Construction: Worked flat in rows to create a rectangle, then folded and seamed to form a tube.
- Finished Dimensions & Sizing: Adult Small/Medium (approx. 9 inches wide by 11 inches tall before folding).
Materials & Supplies Needed
- Yarn: Worsted #4 weight, 100% acrylic or wool blend, approximately 200 yards.
- Hook Size: 5.0 mm (H-8).
- Notions: Tapestry needle for seaming, scissors, and a measuring tape.
- Safe yarn substitutions: Cotton yarn will result in a heavier, less elastic hat, so consider sizing down the hook if using 100% cotton to maintain tension. Acrylic blends offer the best balance of stretch and warmth for this specific ribbing technique.
Stitch Guide & Abbreviations (US Terms)
- ch = chain
- hdc = half double crochet
- BLO = back loop only (insert hook under the back loop of the stitch rather than both loops to create ridges)
- st/sts = stitch/stitches
- sl st = slip stitch
- FO = fasten off
Step-by-Step Pattern Instructions
Hat Body
- Row 1: Ch 46. Hdc in the third ch from hook and in each ch across. Turn. (44 sts)
- Row 2: Ch 2 (counts as first hdc here and throughout), hdc BLO in the next st and each st across. Turn. (44 sts)
- Rows 3–50: Repeat Row 2 until the piece measures approximately 18 inches unstretched.
- Finishing: Leave a long tail of 12 inches for seaming. FO.
Assembly and Shaping
- Fold the rectangle in half so the short ends meet.
- Using the long tail and your tapestry needle, whip stitch the two short ends together to create a tube.
- With the same yarn, weave your needle through the edge of the tube at the top of the hat. Pull the yarn tight to cinch the top closed.
- Secure the center with a knot and weave in your ends on the inside of the hat. Turn the hat right-side out and fold the bottom edge up to create the brim.
Care & Washing Instructions
- Hand wash in cool water using a gentle detergent specifically formulated for wool or acrylic fibers.
- Lay the hat flat on a clean towel to air dry, reshaping it while damp to ensure the ribbing remains straight.
- Avoid using a tumble dryer, as high heat can damage synthetic fibers and cause the hat to lose its natural elasticity.
Pro Tips & Common Mistakes to Avoid
- Maintain consistent tension when working the BLO rows. If your stitches become too tight, the fabric will lose the stretch required for a comfortable fit.
- Place a stitch marker in the first chain of every row. This helps you identify the turning point and ensures your stitch count remains exactly 44 throughout the project.
- When seaming, use the mattress stitch for a nearly invisible join. Working this on the inside of the hat ensures the seam does not create a bulky ridge against your skin.
- Adjust the size by adding or subtracting foundation chains. Each chain added or removed changes the height of the hat; note that you will need more or less yarn depending on these adjustments.
Frequently Asked Questions
Can I use a different yarn weight for this pattern?
Using a lighter weight yarn will result in a much smaller, thinner hat. If you change the weight, you must adjust the number of foundation chains to match the desired height and add more rows to ensure the circumference fits correctly.
Is this project suitable for someone who has never crocheted before?
This pattern is excellent for beginners because it relies on the half double crochet stitch and a simple flat construction method, allowing you to focus on developing even tension without complex shaping.
Can I sell the hats I make from this pattern?
You are welcome to sell finished items created from this pattern. I only ask that you credit the design and use your own original photographs for your listings.
How do I prevent the top of the hat from being too bulky?
When cinching the top, ensure you use a long tail and pull firmly but steadily. Using a thinner yarn for the final cinch can also help reduce bulk if you find the seam is too thick.
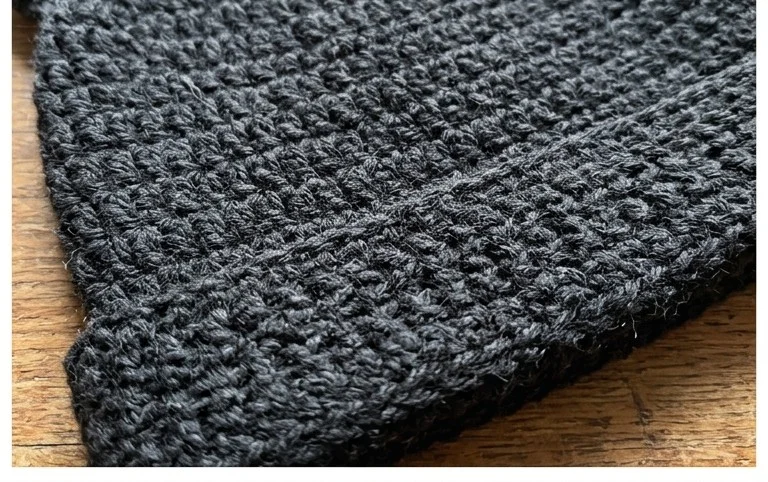
Your new cat ear beanie is ready to wear, providing a soft layer of warmth for cold days or a playful accessory for a weekend outing. You might consider holding two strands of lighter weight yarn together to create a variegated look or adding a small embroidered face to the front for extra personality. Please share a photo of your finished project online to inspire other makers in the community. Explore more free patterns on the blog to fill your wardrobe with handmade items for every season.