Easy Crochet Beanie: Free Pattern & Video Tutorial
Soft wool against your ears makes the cold winter wind disappear, and this ribbed beanie provides exactly that kind of cozy warmth. You will work with a simple half double crochet stitch in the back loop to create a fabric that looks like knitting but feels much faster to construct. This project is a genuine joy for beginners who want a functional result in just one evening of work. Whether you are stitching a gift for a toddler or a larger size for yourself, the pattern adapts through basic row counts. You will find that this repetitive motion creates a meditative rhythm, helping you finish a high-quality accessory without any complicated shaping or difficult seams to hide.
Why You’ll Love This Pattern
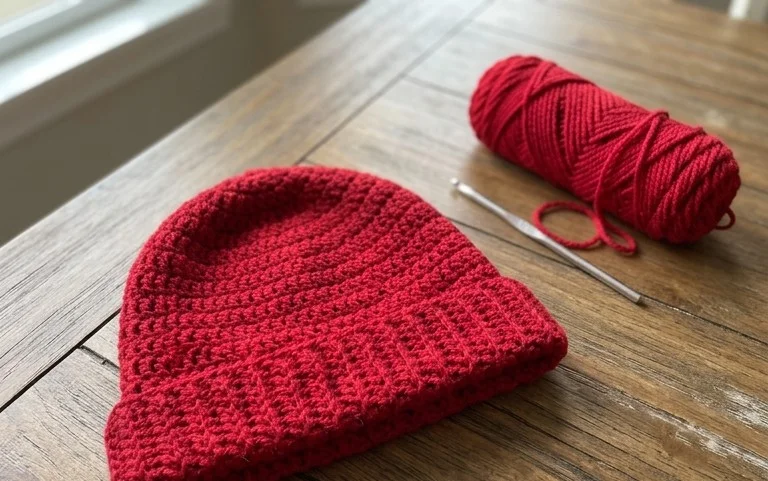
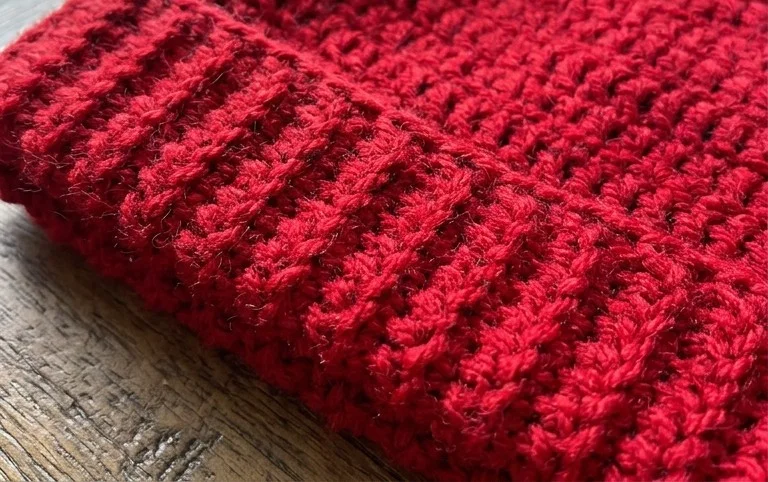
This crochet ribbed beanie pattern uses a simple construction method that mimics the look of knitwear. By working in turned rows of half double crochet in the back loop only, the fabric creates a stretchy, vertical ribbing that fits snugly against the head. It is a one-skein project, making it an ideal choice for stash-busting or a quick last-minute gift. The design is gender-neutral and relies on a meditative, repetitive stitch pattern that is perfect for crocheting while catching up on a favorite show. Because the hat is worked as a flat rectangle before being seamed, it is highly adjustable for any head size.
I finished this hat in just one evening. The ribbed texture looks so professional and the fit is incredibly comfortable without being too tight.
— Sarah, hobbyist crocheter
Pattern Overview & Skill Level
- Skill Level: Beginner
- Approximate Time: 3 to 4 hours
- Construction: Worked flat in one rectangular piece and seamed
- Finished Dimensions: 9 inches wide by 11 inches tall (standard adult medium), adjustable
Materials & Supplies Needed
- Yarn: Worsted weight (#4) acrylic or wool blend, approximately 200 yards.
- Hook Size: 5.0 mm (H-8) crochet hook.
- Notions: Yarn needle for seaming, scissors, and a locking stitch marker.
- Safe yarn substitutions: You may use a cotton yarn, but be aware that it will lack the “spring” of wool or acrylic, resulting in a heavier, less stretchy hat. If using a thinner sport-weight yarn, increase your starting chain length to match the desired height.
Stitch Guide & Abbreviations (US Terms)
- ch = chain
- hdc = half double crochet
- st = stitch
- sl st = slip stitch
- BLO = back loop only: Insert your hook only under the back loop of the stitch instead of both loops to create the ribbed effect.
- Turn = turn your work to begin the next row.
Step-by-Step Pattern Instructions
This beanie is constructed by working rows back and forth. You will create a large rectangle and then seam the short sides together to form a tube, followed by gathering the top.
Hat Body
- Row 1: Ch 46. Work 1 hdc in the third chain from the hook and in each chain across. (44 sts)
- Row 2: Ch 2, turn. Work 1 hdc in the BLO of each st across. (44 sts)
- Rows 3–60: Repeat Row 2 until the piece measures approximately 18 inches in width when slightly stretched. Do not fasten off.
Assembly and Finishing
- Seaming: Fold the rectangle in half, matching the short ends together. Slip stitch through the BLO of the last row and the foundation chain across the entire edge to create a tube. Fasten off, leaving a 12-inch long yarn tail.
- Gathering the Crown: Thread your yarn tail onto a tapestry needle. Weave the needle in and out through every other stitch along the top edge of the tube. Pull the yarn tail firmly to cinch the opening closed.
- Securing: Secure the hole by stitching across the center several times. Turn the hat inside out to ensure the seam is on the inside and weave in all remaining loose ends.
Care & Washing Instructions
- Hand wash in cool water using a gentle detergent specifically made for delicate fibers.
- Lay the hat flat on a clean towel and reshape it to its original dimensions while damp.
- Do not hang to dry, as this will stretch out the ribbing and cause the hat to lose its shape.
Pro Tips & Common Mistakes to Avoid
Maintain consistent tension throughout the project so the ribbing appears uniform. If your tension is too loose, the hat will stretch out quickly with wear. Always place a stitch marker in the first stitch of every row to ensure you do not accidentally skip the last stitch, which is a common mistake that causes the edges of your rectangle to taper. If you want a slouchy fit, simply add more rows to the width of the rectangle before seaming. Remember that the length of your starting chain determines the height of the hat, so you can easily customize it to be shorter or taller by adjusting that initial chain count.
Frequently Asked Questions
Can I substitute the worsted weight yarn for a chunky yarn?
You can, but you will need to reduce your starting chain length significantly and adjust your hook size to the recommendation on the chunky yarn label to avoid a fabric that is too stiff.
How do I adjust the size for a child?
To make a smaller size, start with a chain of 35 instead of 46, and work fewer rows until the rectangle fits comfortably around the child’s head.
Is it okay to sell hats made from this pattern?
You are welcome to sell finished items you create from this pattern, but please provide credit to this website as the designer in your product listings.
Why is my hat edge uneven?
An uneven edge usually happens if you are missing the final stitch of the row. Always count your stitches at the end of every row to ensure you have exactly 44 stitches before turning.
Your finished hat brings a handmade touch to your winter wardrobe, offering a clean, modern texture that pairs well with any coat or scarf. Try working your next version in a variegated yarn to add visual depth without needing to switch colors mid-row, or adjust the starting chain by an extra inch if you prefer a slouchier fit. If you enjoyed this project, please share a photo of your work on Instagram or Pinterest to inspire other makers in the community. You can find more free patterns and seasonal craft ideas by browsing the archives on the main blog page throughout the year.