Easy Beginner Ribbed Beanie: Free Crochet Hat Pattern
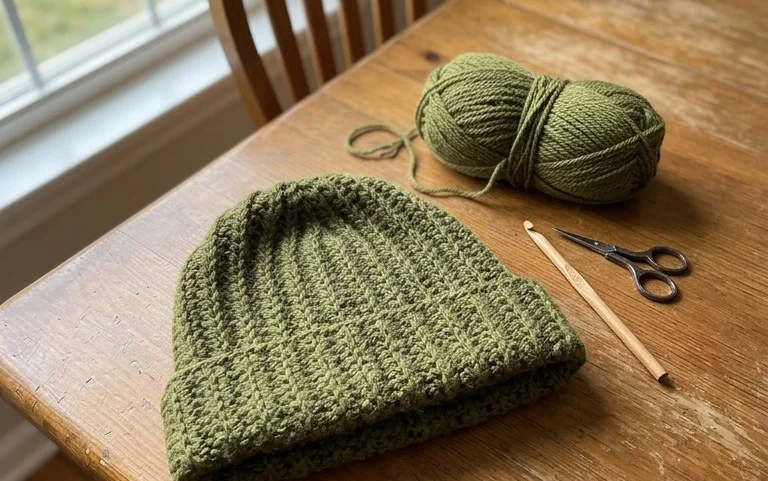
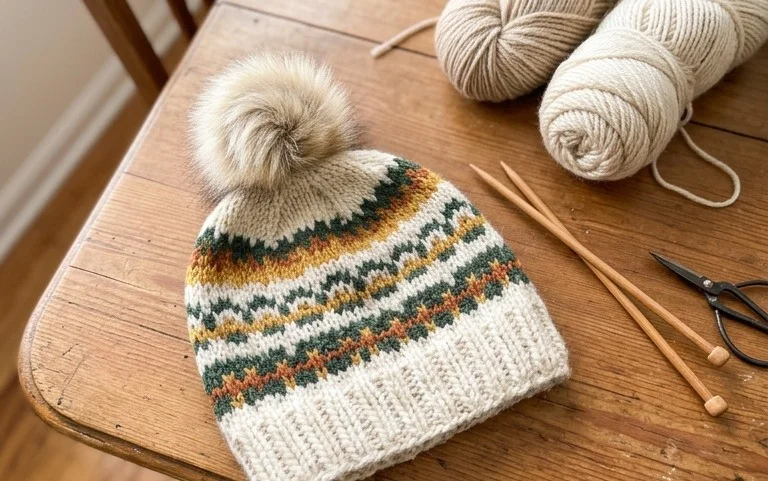
Soft to the touch and thick enough for windy winter walks, this ribbed beanie has a classic silhouette that suits everyone from young children to adults. It works up as a simple flat rectangle, making it a stress-free project for beginners who want to practice tension while creating a handmade gift in just a few hours. You will use the half double crochet stitch worked into the back loops to get that stretchy, professional texture often found in store-bought accessories. This pattern is a reliable staple for your winter wardrobe that requires minimal counting and keeps the creative process enjoyable.
Why You’ll Love This Pattern
This crochet ribbed beanie pattern uses a simple half double crochet construction that creates a classic, stretchy texture suitable for all ages. It relies on the back loop only technique to provide a natural elasticity, ensuring the hat fits snugly without feeling tight. The project works up quickly, making it an ideal choice for last-minute gifts or for batch-making during holiday seasons. You only need to know how to chain and half double crochet to complete the entire design.
I finished this hat in one evening while watching a movie. The ribbed effect is very professional and the fit is perfect for my nephew who has a larger head size.
— Sarah, hobbyist crocheter
Pattern Overview & Skill Level
- Skill Level: Beginner
- Approximate Time: 2 to 3 hours
- Construction: Worked as a flat rectangle in rows, then seamed at the side and gathered at the top to form a beanie.
- Finished Dimensions: 9 inches tall by 18 inches circumference (unstretched), fits an average adult head.
Materials & Supplies Needed
- Yarn: Worsted weight #4, 100% acrylic or wool blend, approximately 200 yards.
- Hook Size: 5.5 mm / I-9 crochet hook.
- Notions: Tapestry needle for weaving ends and seaming, stitch markers, and a tape measure.
- Safe yarn substitutions: You may use cotton yarn, though it will have less stretch and the hat will be heavier; adjust the starting chain length if you choose a lighter weight yarn to maintain the 9-inch height.
Stitch Guide & Abbreviations (US Terms)
- ch: Chain
- hdc: Half double crochet
- BLO: Back loop only. Insert hook only under the back loop of the stitch instead of both loops to create ridges.
- st/sts: Stitch/stitches
- sl st: Slip stitch
Step-by-Step Pattern Instructions
Main Hat Body
- Row 1: Ch 35. Hdc in the third ch from hook and in each ch across. Turn. (33 sts)
- Row 2: Ch 2 (does not count as st). Hdc in BLO of each st across. Turn. (33 sts)
- Rows 3 to 60: Repeat Row 2 until the piece measures approximately 18 inches long when slightly stretched. Do not fasten off after the final row.
Seaming and Finishing
Fold the rectangle in half so that the short edges meet. Using the tail of your yarn and a tapestry needle, sew the two short edges together using a whip stitch or mattress stitch. Secure the yarn and cut, leaving a long tail of about 10 inches.
Thread the tapestry needle with the remaining tail. Weave the needle in and out through the edge of the top of the hat, passing through every other row end. Pull the yarn tight to cinch the top closed. Secure the top with several tight stitches to ensure there is no hole. Weave in all remaining ends on the inside of the hat.
Care & Washing Instructions
- Hand wash in cool water with a mild detergent to prevent shrinking or distortion of the ribbing.
- Lay the beanie flat on a towel to air dry completely, away from direct heat sources.
- Do not iron or dry clean, as this can destroy the bounce of the stitches.
Pro Tips & Common Mistakes to Avoid
Maintaining consistent tension is the most important part of this pattern. If your stitches are too tight, the fabric will be stiff, making it difficult to achieve the desired stretch for a comfortable fit. Use a stitch marker on the first stitch of every row to ensure you do not accidentally skip the final stitch, which would cause the edges of your rectangle to taper or slant. Weave your ends in by traveling through the vertical ribs of the interior, as this hides the yarn tail completely without creating bulky knots. If you want a larger or smaller hat, add or subtract chains at the beginning, but remember that this will affect the amount of yarn you need for the final assembly.
Frequently Asked Questions
Can I use a different yarn weight for this pattern?
You can use a different weight, but it will change the finished size significantly. If you use a lighter weight, you will need to increase your starting chain length to hit the 9-inch target height and work more rows to reach the 18-inch circumference.
Is this project suitable for a complete beginner?
Yes, this is an excellent first project. It uses only one basic stitch, the half double crochet, and focuses on practicing consistent tension throughout a repetitive motion.
How do I adjust the size for a child?
To make a smaller hat, start with a shorter chain for your desired height. Work fewer total rows until the piece wraps comfortably around the head of the intended recipient.
Am I allowed to sell hats made from this pattern?
You are welcome to sell finished items created from this pattern. Please credit the original design and use your own photographs when listing your items online.
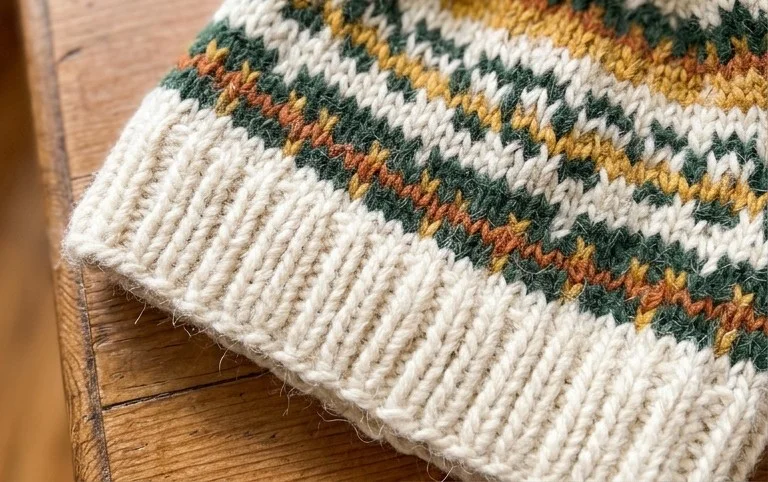
Your new ribbed beanie is ready to wear and will keep you warm through the coldest months of the year. Try working this pattern in a variegated yarn to give the texture a unique look or add a faux fur pompom for an extra touch of style. I love seeing how your projects turn out, so please share a photo on your favorite social media platform. You can find more beginner-friendly projects and free patterns by browsing the rest of my blog archives.